
How to Caulk a Bathtub in Dubai: A 2026 Guide
Learn how to caulk a bathtub in Dubai with our 2026 step by step guide. Prevent water damage and mold with the right sealant and techniques.
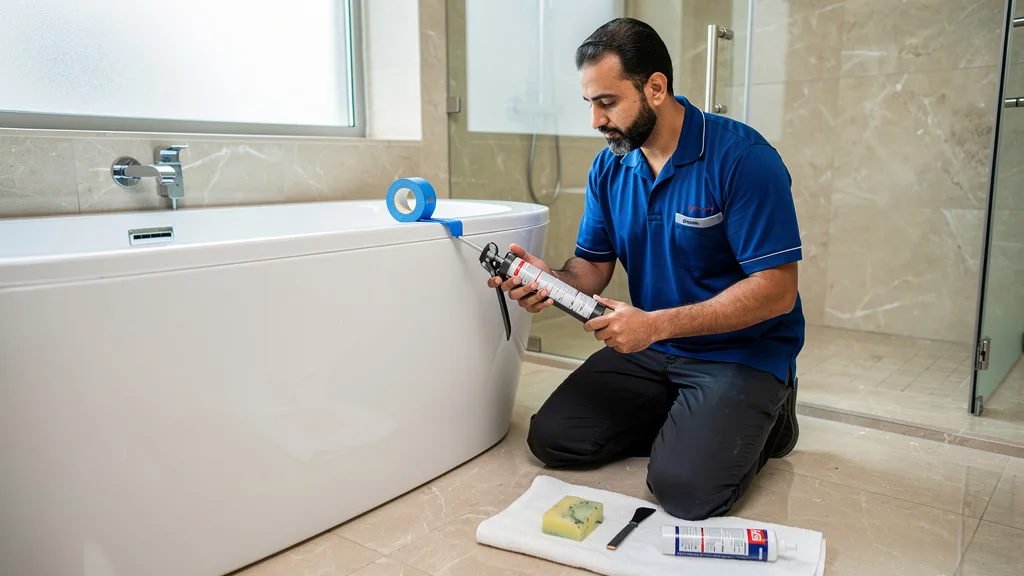
Are you noticing cracked, peeling, or moldy sealant around your bathtub? In Dubai's humid environment, failing caulk is more than just an eyesore; it's a direct invitation for water damage, structural issues, and unhealthy mold growth behind your walls. Properly sealing your tub is one of the most critical maintenance tasks for protecting your home's value and hygiene.
Performing bathtub caulking in Dubai involves removing the old, failing sealant, thoroughly cleaning and drying the joint, and applying a new bead of high-quality, anti-mold silicone. The new sealant must then be smoothed into a concave shape and allowed to fully cure for at least 24-48 hours to create a durable, waterproof barrier that withstands Dubai's humidity and prevents costly water leaks.
When faced with deteriorating bathtub caulk, homeowners in Dubai often weigh the options of tackling the job themselves or hiring a professional. A DIY approach can be rewarding and cost-effective if you have the time, patience, and the right tools. It allows you to control the project timeline and gain a new skill, but it comes with risks. An improperly applied seal can fail quickly, leading to the very water damage you sought to prevent.
Hiring a professional handyman ensures the job is done correctly and efficiently from the start. Certified technicians have the experience to create a perfect, long-lasting seal, identify any underlying moisture issues, and use professional-grade materials. While the initial cost is higher, it provides peace of mind with a quality finish and often includes a service warranty, saving you from future headaches and potentially more expensive repairs down the line.
Choosing the Best Anti-Mold Sealant for Dubai's Climate
The success of your bathtub caulking project hinges on selecting the right sealant. In a persistently warm and humid climate like Dubai's, not just any caulk will do. You need a product specifically formulated to resist the growth of mold and mildew, which thrive in damp bathroom environments. The best choice is a 100% silicone sealant with added fungicides.
Unlike acrylic or latex-based caulks, 100% silicone is permanently waterproof, highly flexible, and does not shrink or crack over time. This flexibility is crucial for handling the subtle shifts and movements between the bathtub and wall tiles due to temperature fluctuations. Investing in a premium, anti-mold silicone sealant is non-negotiable for achieving a durable and hygienic seal in any Dubai bathroom.
Sika vs Soudal vs Bostik: Which Sealant Is Best for Bathrooms?
When you walk into a hardware store in the UAE, you'll likely encounter several trusted brands of sealants. Sika, Soudal, and Bostik are three of the leading names, each offering excellent products suitable for bathroom applications. While all three provide high-quality sanitary silicone, they have minor differences in formulation, application, and price.
Soudal is often praised for its superior mold resistance and ease of application, making it a favorite among both DIYers and professionals. Sika is renowned for its industrial-strength durability and adhesion, making it an excellent choice for high-use areas. Bostik offers a great balance of performance and value, with reliable anti-fungal properties. Your final choice may depend on specific product availability and your budget, but you can't go wrong with a sanitary-grade silicone from any of these reputable manufacturers.
| Feature | Sika (e.g., Sikasil C) | Soudal (e.g., Soudal Fix All) | Bostik (e.g., Bostik V70) |
|---|---|---|---|
| Sealant Type | 100% Silicone (Neutral Cure) | Hybrid Polymer / Silicone | 100% Silicone (Neutral Cure) |
| Mold Resistance | Excellent, contains fungicide | Excellent, superior anti-fungal | Very Good, contains fungicide |
| Flexibility | High | Very High | High |
| Curing Speed | Standard (Approx. 2mm/24h) | Fast (Skin time ~10 mins) | Standard (Approx. 3mm/24h) |
| Best For | Durability and adhesion | Ease of use and mold prevention | Value and all-around performance |
Key Features to Look for in a Bathroom Sealant for 2026
To ensure your new caulk line lasts for years, look for a product with a specific set of features tailored for wet and humid environments. Reading the product label carefully is essential to avoid choosing an inferior sealant that will fail prematurely.
Here are the critical features your bathroom sealant must have:
- 100% Silicone Composition: This guarantees permanent waterproofing and flexibility. Avoid 'siliconized acrylic' for tub and shower surrounds.
- Built-in Fungicide: The label should explicitly state that it is 'mold-resistant,' 'mildew-proof,' or 'sanitary grade' to prevent black spots from forming.
- Excellent Flexibility/Elasticity: Look for a product that can accommodate joint movement without cracking, often specified as a percentage (e.g., ±25% movement capability).
- Low VOC (Volatile Organic Compounds): A low-VOC formula is safer for indoor air quality, releasing fewer harmful fumes during application and curing.
- Non-Yellowing Formula: Choose a sealant that is rated as 'non-yellowing' or 'UV resistant' to keep your white caulk lines looking clean and bright over time.
Essential Tools and Materials for Bathtub Caulking
Gathering all your tools and materials before you start will make the process smoother and help you achieve a more professional result. Having everything within arm's reach prevents you from having to stop mid-application, which can compromise the finish.
Here is a checklist of essential items for the job:
- A high-quality tube of 100% silicone sanitary sealant
- A dripless caulk gun
- A utility knife or specialized caulk removal tool
- A plastic scraper or putty knife
- Painter's tape (low-tack)
- Rubbing alcohol or mineral spirits
- Clean rags or paper towels
- A caulk smoothing tool or a wet finger
- Disposable gloves
"The secret to a professional caulking job isn't in the application; it's in the preparation. Over 90% of caulk failures I see are due to residue or moisture left on the surface before the new bead was applied. Never skip the cleaning step." - Lead Technician, PropertyMaintenanceUAE
Step-by-Step Guide to Caulking Your Bathtub
With your materials ready, you can now begin the process of re-caulking your bathtub. Follow these steps carefully for a clean, waterproof seal that will protect your bathroom for years. Work patiently and methodically, as rushing any step can lead to a poor outcome.
Step 1: Remove the Old, Damaged Caulk
The first and most crucial step is to completely remove every trace of the old sealant. Applying new caulk over old is a common mistake that guarantees failure, as the new bead will not adhere properly. Use a utility knife to carefully cut along both sides of the old caulk line. Be cautious not to scratch the surface of the bathtub or tiles.
Once you've made the cuts, use a caulk removal tool or a plastic scraper to peel and scrape the old sealant out of the joint. Pliers can be helpful for pulling out long, stubborn strips. Take your time with this step to ensure the gap is completely clear of any old material. prevent costly water leaks.
Step 2: Clean and Prepare the Surface for a Perfect Seal
After removing the old caulk, the next step is to deep clean the joint. Any remaining soap scum, mildew, or sealant residue will prevent the new caulk from bonding. Use a stiff brush and a bathroom cleaner to scrub the area, then rinse thoroughly. If you see signs of mold, treat the area with a bleach solution or a commercial mold killer and let it sit before rinsing.
Once clean, the surface must be perfectly dry. Use a hairdryer or let it air dry completely for several hours. As a final preparation step, wipe the joint with a clean rag dampened with rubbing alcohol or mineral spirits. This removes any final traces of residue and ensures maximum adhesion. If you notice dampness or damage behind the tiles, it might indicate a larger issue, like a slow leak that requires a professional plumber to investigate. You can learn more about identifying signs of a water leak in our guide.
Step 3: Apply the New Silicone Sealant
For a crisp, straight line, apply painter's tape to create parallel borders on the tub and the wall, leaving an even gap of about 3-5mm for the caulk. Prepare the sealant tube by cutting the tip at a 45-degree angle, making the opening just large enough to fill the gap. Puncture the inner seal with a long nail or the tool on the caulk gun.
Load the tube into the caulk gun. Starting in one corner, apply steady, consistent pressure to the trigger and move the gun smoothly along the joint. Your goal is to apply a continuous, even bead of sealant that completely fills the gap. Move at a steady pace to avoid bumps or gaps in the caulk line.
Step 4: Smooth the Caulk Bead for a Professional Finish
Immediately after applying the sealant to one section, you need to 'tool' or smooth the bead. This step pushes the caulk firmly into the joint to ensure a complete seal and creates a neat, concave profile that sheds water effectively. You can use a dedicated caulk smoothing tool or simply your fingertip dipped in soapy water to prevent the silicone from sticking.
Starting at the beginning of your bead, apply light, consistent pressure and drag your finger or tool along the entire length in one smooth motion. Wipe away any excess that collects on your tool with a paper towel. Once smoothed, carefully remove the painter's tape by pulling it away from the joint at a 45-degree angle. Do this before the caulk starts to form a skin for the cleanest edge.
Step 5: Curing Time in Dubai's Humid Climate
Curing is the chemical process where the sealant dries and hardens to achieve its final strength and waterproof properties. This process is highly dependent on temperature and humidity. In Dubai's humid climate, curing can take longer than in drier regions. While the caulk may be 'tack-free' or dry to the touch within an hour, it is not yet waterproof.
You must protect the new caulk line from any water exposure during the curing period. Check the manufacturer's instructions, but as a general rule, allow a minimum of 24 to 48 hours before using the shower or tub. In the most humid summer months, it may be wise to wait up to 72 hours to ensure the sealant has fully hardened and will provide a lasting, durable seal.
Common Mistakes to Avoid When Caulking a Bathtub
Even a seemingly simple task like caulking has pitfalls that can lead to a failed seal. Avoiding these common errors will significantly increase the lifespan and effectiveness of your work.
- Applying New Caulk Over Old Caulk: This is the most frequent mistake. The new sealant will not bond properly and will peel away quickly. Always remove 100% of the old material.
- Inadequate Surface Preparation: Failing to clean away all soap scum, mildew, and moisture will compromise adhesion. The surface must be perfectly clean and dry.
- Using the Wrong Type of Sealant: Using acrylic or painter's caulk in a wet area is a recipe for disaster. Always use 100% silicone sanitary-grade sealant for bathrooms.
- Applying Too Much or Too Little: A bead that is too thin won't fill the joint properly, while a bead that is too thick is difficult to smooth and looks messy.
- Skipping the Smoothing Step: A non-tooled bead will not be properly pressed into the joint, leaving gaps and a rough surface that traps dirt.
- Not Allowing Proper Cure Time: Exposing the new caulk to water before it has fully cured will wash it away or prevent it from ever becoming waterproof.
These small details make a huge difference. Taking care to avoid these errors is just as important as knowing how to unclog a drain yourself when it comes to preventative bathroom maintenance.
Hiring a Handyman for Bathtub Caulking in Dubai
If the DIY route seems too daunting or you simply want a guaranteed professional result, hiring a handyman is an excellent option. A skilled technician can complete the job quickly and to a high standard, ensuring your bathroom is protected from water damage. They have the right tools and expertise to handle any unexpected issues, like difficult-to-remove old caulk or signs of deeper moisture problems.
How Much Does It Cost to Re-Caulk a Bathtub?
The cost to hire a professional to re-caulk a bathtub in Dubai is quite affordable and offers great value for the peace of mind it provides. As of 2026, you can expect the service to cost anywhere from AED 180 to AED 400. The final price depends on the length of the area to be caulked (e.g., around the tub, shower enclosure, sink), the condition of the existing caulk, and whether any significant mold remediation is required.
At PropertyMaintenanceUAE, our handyman services start with transparent, upfront pricing, so you know the cost before the work begins. This small investment protects you from the much higher costs associated with repairing water damage, such as replacing tiles or fixing structural issues. You can view our complete home maintenance pricing guide for more details.
Finding Top-Rated Handyman Services for Bathroom Repairs
When choosing a handyman service in Dubai, it's important to look for a company that is reliable, transparent, and professional. Start by checking online reviews and asking for recommendations from friends or community groups. A reputable company should be licensed and insured, providing a layer of protection for you and your property.
Look for companies that offer a warranty on their workmanship, like our 30-day labor warranty, which shows they stand behind the quality of their service. Clear communication and transparent pricing are also key indicators of a trustworthy provider. Ensuring you hire a company with a track record of excellence, much like when you choose a licensed electrician, is vital for any home repair job.
Key Takeaways
Properly maintaining your bathtub's sealant is a critical task for any Dubai resident. Here are the most important points to remember from this guide: costly water leaks.
- Prevention is Key: A well-maintained caulk line is your first line of defense against water damage, mold, and costly structural repairs.
- Choose the Right Material: Always use a 100% silicone, anti-mold sealant for bathrooms in Dubai's humid climate. Brands like Sika, Soudal, and Bostik are excellent choices.
- Preparation is Everything: You must completely remove all old caulk and thoroughly clean and dry the surface for the new sealant to adhere correctly.
- Application Technique Matters: Apply a steady bead, smooth it for a clean profile, and remove painter's tape before the caulk skins over.
- Be Patient with Curing: Allow at least 24-48 hours for the new sealant to fully cure before exposing it to water. Humidity can extend this time.
- When in Doubt, Hire a Pro: If you're not confident in your DIY skills, hiring a professional handyman is an affordable and effective way to ensure the job is done right.
Frequently Asked Questions
How often should you re-caulk a bathtub in Dubai?
In Dubai's demanding climate, it's a good practice to inspect your bathtub caulk annually. Generally, high-quality silicone sealant should last between three to five years. However, you should plan to re-caulk as soon as you notice any signs of degradation, such as cracking, shrinking, peeling, or the appearance of mold that cannot be cleaned off.
Regular inspection and proactive replacement are the best ways to prevent water from seeping into the walls. In high-use bathrooms, the lifespan of the caulk might be on the shorter end of that range, so vigilance is key. hiring a.
Can you apply new caulk over old caulk?
No, you should never apply new caulk over old caulk. This is a common shortcut that leads to premature failure. The new sealant will not be able to form a strong, waterproof bond with the old, deteriorating material or the tub surface. It will quickly peel away, trapping moisture underneath and making the problem worse.
For a durable, long-lasting seal, it is absolutely essential to completely remove all traces of the old caulk. This ensures the new sealant adheres directly to the clean, dry surfaces of the tub and tile, creating the strong bond needed for a waterproof barrier.
What is the difference between silicone and acrylic caulk for bathrooms?
The main difference lies in their composition and intended use. 100% silicone caulk is inorganic, waterproof, and highly flexible, making it the ideal choice for wet areas like bathtubs, showers, and sinks. It contains fungicides to resist mold and mildew growth and adheres well to non-porous surfaces like tile, glass, and porcelain.
Acrylic caulk, or 'painter's caulk,' is water-based, less flexible, and is not waterproof. It is designed for filling dry gaps in areas like baseboards, window frames, and trim before painting, as paint adheres well to it. Using acrylic caulk around a bathtub will result in it quickly degrading, washing away, and failing to prevent leaks.
How do you know if your bathtub caulk needs replacing?
You can tell your caulk needs replacing by performing a simple visual inspection. Look for obvious signs of failure such as visible cracks, gaps, or areas where the sealant is peeling away from the tub or wall. Any break in the seal can allow water to penetrate.
Another clear indicator is the presence of black or dark spots of mold or mildew that are embedded in the caulk and cannot be removed with cleaning. This suggests that moisture has compromised the sealant. If the caulk feels hard and brittle instead of flexible and rubbery, it has lost its elasticity and should also be replaced.
Is it necessary to use painter's tape for a straight caulk line?
While not strictly necessary for experienced professionals, using painter's tape is highly recommended for DIYers and anyone wanting to achieve a perfectly straight, clean caulk line. It acts as a guide and prevents the sealant from smearing onto the tub and tile surfaces, resulting in a much neater finish.
The small amount of extra time it takes to apply the tape pays off significantly in the final appearance. It allows you to focus on applying an even bead and smoothing it properly without worrying about making a mess. For a professional-looking result, the tape method is nearly foolproof.
Conclusion
Mastering how to caulk a bathtub in Dubai is an essential home maintenance skill that directly protects your property from the persistent threat of water damage and mold. By choosing a high-quality, anti-mold silicone sealant, meticulously preparing the surface, and allowing ample curing time, you can create a durable, waterproof seal that stands up to the local climate. Whether you tackle it as a DIY project or entrust it to a professional, a properly sealed bathtub is fundamental to a healthy and well-maintained home.
If you're short on time or prefer the guaranteed results of an expert, our certified handyman team is ready to help. We provide fast, reliable, and professional bathtub caulking services across Dubai with upfront pricing and a 30-day warranty. Protect your home from water damage today. Book a Service Now.
Need certified on-demand property maintenance in Dubai?
Sub-4 hour response SLA • 30-day labor warranty • Upfront pricing from AED 180.